Author: Emil J. Bustamante
This week I’ll be delivering an overview of our progress discussing the rain irrigation project. To assist in my explanation, I’ve included a before photo, a sketch drawing, digital rendering and a final sketch by Christina Brenckman of our group. Our hope is that our project, as well as figures like these, will serve as assistance to and guidance to other projects like our anywhere in the world.
This week I’ll be delivering an overview of our progress discussing the rain irrigation project. To assist in my explanation, I’ve included a before photo, a sketch drawing, digital rendering and a final sketch by Christina Brenckman of our group. Our hope is that our project, as well as figures like these, will serve as assistance to and guidance to other projects like our anywhere in the world.
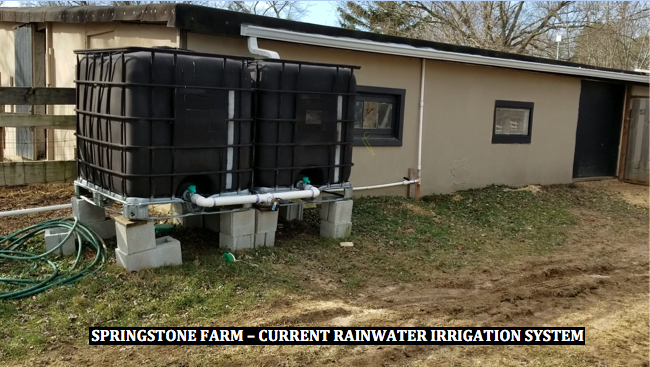
As mentioned in previous posts, the purpose of this portion of the project was to collect rainwater from the barn roof into several totes and somehow get it out to the back field for irrigation. At the start of the project, there were two areas for the collecting rainwater. The first area, as shown in the photo, and the other just several feet to the right of the first. The goal was to get them all in one area. With that said, a noticeable issue had been occurring on the ground underneath the totes. The ground was sinking! Basically, the soil started to sag from the water overflowing from the totes as well as the weighted pressure from the mass of water filling over the cinder block base.
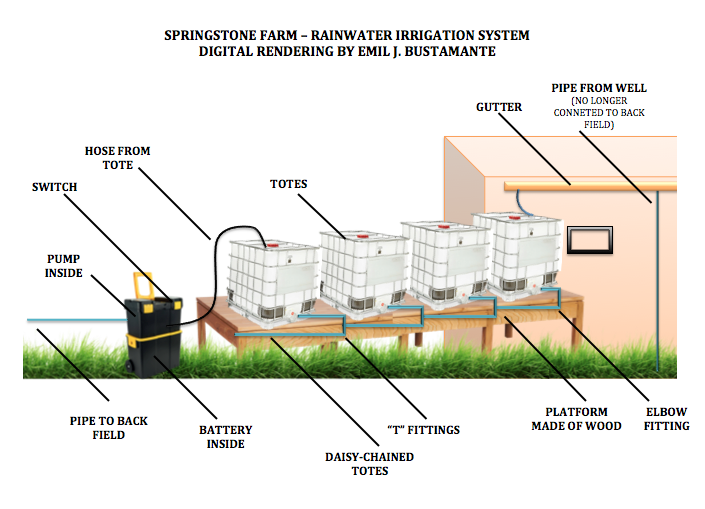
The first recommendation was a platform made of wood that would extend the length of all daisy-chained totes. Just like a wood deck. However, over time it could suffer issues like algae growth(depending on the type of wood), drying out, and ultimately sagging all over again. The best solution was a base made of cement that would cover the area of all the totes. Christina worked diligently to calculate all the measurements and process needed for laying this type of base.
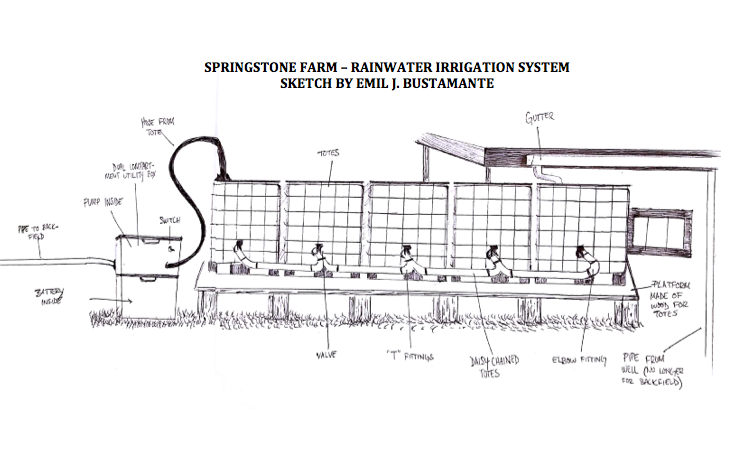
The next important section to mention is the pump and battery hook up that we chose for this proposal. After much searching we came across a youtuber by the publisher name of “southerprepper1” (link below). He shows a practical way of setting up a Battery and 12V, 50psi, Flojet pump that puts out 2.9 gallons/minute that also includes a pressure switch so its not pumping all day long. The battery goes into the bottom compartment of the tool box while the pump goes in the top compartment. Since this set-up is a not as sustainable one because of battery life Joe would prefer to either connect it to a solar panel or direct wiring to the electricity already installed in the barn.
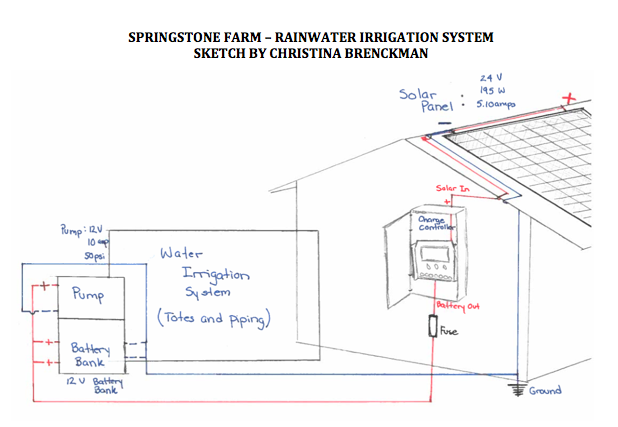
The sketch below depicts a concept for future consideration. The installation a solar panel on the barn roof with a charge controller installed on the side of the structure. Extensive research by Christina concluded that the 12V pump would have to be paired with a 12V battery. What this means is that the controller would have to regulate its voltage is to the 12V battery bank system used specifically to contain and store the raw energy produced by the solar panels.
We were more than happy to assist Joe in this project. Although he had already done major work towards a workable system already we were glad to contribute additional options and work towards the goal of being even more efficient and sustainable. We look forward to posting an “after” photo of all the progress!
We were more than happy to assist Joe in this project. Although he had already done major work towards a workable system already we were glad to contribute additional options and work towards the goal of being even more efficient and sustainable. We look forward to posting an “after” photo of all the progress!
Reference:
Affordable off Grid Pressurized Water for the Home.” YouTube, southernprepper1, 28 July 2016, youtu.be/bxDtdvHoq3s.
Affordable off Grid Pressurized Water for the Home.” YouTube, southernprepper1, 28 July 2016, youtu.be/bxDtdvHoq3s.
 RSS Feed
